
Side Dishes
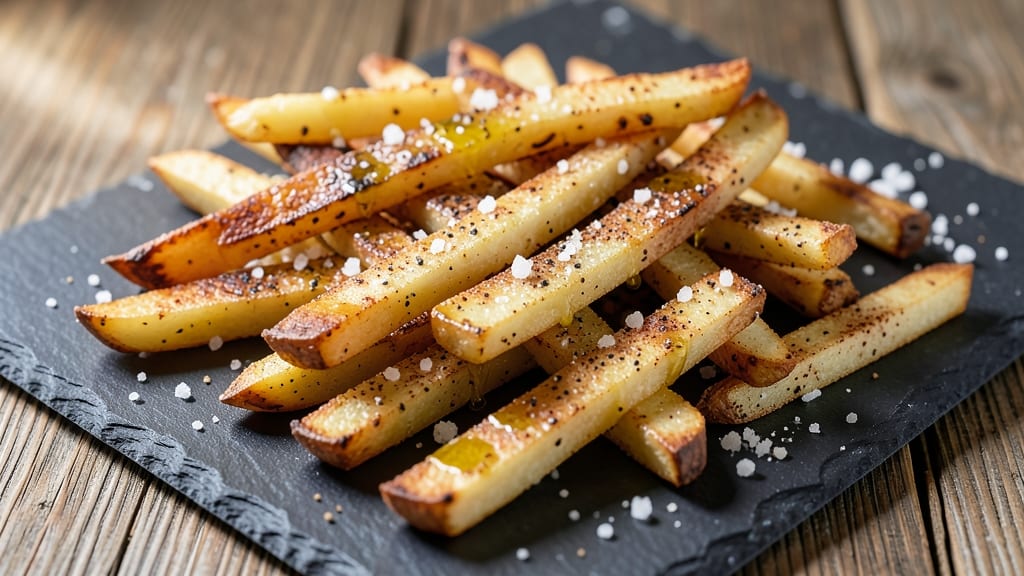
This baked potato strips recipe delivers crispy, crunchy bites that rival anything from a fast-food joint—but with healthier ingredients and a fraction of the grease. 🔥 The secret lies in proper cutting, high-heat baking, and a simple seasoning blend that enhances their natural flavor without overpowering it.
I've perfected this method after countless trial runs, ensuring every strip achieves that satisfying crunch while staying tender inside.
What sets these potato strips apart is their foolproof technique: thick-cut strips baked at high heat (425°F) for just 25 minutes, flipping halfway to guarantee even browning. No double-frying required—this method delivers the same addictive crunch using only the oven.
The seasoning is minimal but impactful: salt, pepper, and a touch of garlic powder create a savory profile that pairs perfectly with dips like ranch or spicy mayo.
By the time they emerge from the oven, you'll have golden, crispy potato strips that hold their shape and deliver that satisfying crunch with every bite. The texture is restaurant-quality—crispy outside, tender inside—making them ideal for game day, snack platters, or a quick side dish.
They stay crispy for hours, so you can serve them at room temperature without losing that coveted crunch.
Serve these potato strips with your favorite dipping sauce or alongside grilled meats for a complete meal. The beauty of this recipe is its versatility—whether you're feeding a crowd or prepping for a weeknight dinner, these crispy bites are a guaranteed crowd-pleaser. Let's get started!
Ingredients for baked potato strips
Eight essential ingredients to create crispy, restaurant-quality potato strips with minimal effort.
| Ingredient | Amount | Notes |
|---|---|---|
| Russet Potatoes 🥔 | 2 lb | Large, uniform size preferred |
| Extra-Virgin Olive Oil 🫒 | 2 tbsp | High smoke point preferred |
| Diamond Crystal Kosher Salt 🧂 | 1 ½ tsp | Fine grain for even coating |
| Freshly Ground Black Pepper 🌶️ | ½ tsp | For enhanced flavor |
| Garlic Powder 🧄 | ½ tsp | For subtle savory depth |
| Paprika 🌶️ | ½ tsp | Smoked variety for color |
| Corn Starch 🌾 | 1 tbsp | For extra crispiness |
| Baking Sheet 🍳 | 1 whole | Heavy-duty for even heat |
| Parchment Paper 📄 | 1 sheet | For easy transfer |
The Russet potatoes are non-negotiable—their high starch content delivers that signature crunch. Grab organic Russets from Whole Foods or your local grocery store's produce section, where they're typically sold in 5-pound bags. Look for potatoes that are firm and free of sprouts, as these indicate freshness. If you're prepping ahead, store them in a cool, dark place (like a pantry) for up to 2 weeks. For best results, use potatoes that are uniform in size—this ensures even cooking. The corn starch is the secret weapon here; it creates an ultra-crispy exterior without compromising the tender interior. Trader Joe's sells it in bulk at a great price, or grab a small box from the baking aisle at Target or Walmart.
No extra-virgin olive oil? Avocado oil works just as well—it has a higher smoke point, which is ideal for high-heat baking. Short on garlic powder? Fresh garlic minced into the oil before tossing adds a brighter flavor, but adjust to taste. The smoked paprika adds color and a subtle smokiness, but regular paprika will still work if that's what you have. For a gluten-free option, skip the corn starch and use arrowroot powder instead. If you're baking for a crowd, double the recipe—just ensure your oven has enough rack space for even baking. The parchment paper prevents sticking and makes cleanup a breeze, but a silicon baking mat works too if you prefer.
These strips stay crispy for hours at room temperature, making them perfect for game day or parties. Store leftovers in an airtight container for up to 3 days, though they'll lose some crunch over time. For longer storage, freeze them for up to 3 months—just bake straight from frozen, adding 5 extra minutes to the cooking time. To reheat, pop them in the oven at 400°F for 5-7 minutes until crispy again. Pro tip: Portion them into single-serving bags before freezing so you can grab just what you need. The olive oil will solidify in the fridge, but that's normal—just let it sit at room temperature for 10 minutes before using.
Why You'll Love This Recipe
- No-Fuss Prep: I swear by this recipe because it’s the kind of dish that lets me multitask. Slice those russets into even strips (no fancy knife skills needed), toss them in olive oil and garlic powder, and let the oven do the rest. Twenty minutes later, you’ve got crispy, golden perfection with zero stress.
- Crispy-Creamy Magic: That first bite—where the outside shatters into a satisfying crunch and the inside stays tender? It’s the olive oil and kosher salt working their magic. The garlic powder adds this subtle warmth that makes it taste like a hug from your favorite diner, but better because it’s homemade.
- Game for Any Meal: Between us, these strips are my secret weapon for lazy Sundays, quick lunches, or even as a side when I’m roasting chicken. They reheat like a dream, too—just toss them back in the oven for a minute or two, and they’re fresh again. Honestly, I’ve served them to guests who thought they were fries, and no one cared.
- Budget-Friendly Crunch: Russet potatoes are cheap, and this recipe stretches them far. A single bag feeds my family for days, and the ingredients cost pennies. Plus, the leftovers? They disappear faster than I can say “second helping,” which means less waste and more happy eaters. It’s the kind of dish that makes grocery day feel like a win.
Step-by-step instructions for crispy baked potato strips
Master the art of oven-baked potato strips with this foolproof method for perfect texture every time.
👨🍳 Step 1: Prep the Potatoes for Maximum Crispiness
Start by preheating your oven to 425°F—this high temperature is crucial for achieving that signature crispy exterior. While it heats, wash the 2 lb Russet Potatoes thoroughly under cold water to remove any dirt from the skin. Pat them completely dry with paper towels, then use a sharp chef's knife to cut them into ¼-inch thick sticks.
Here's the thing—uniform thickness ensures even cooking. I like to cut them into 2-inch long strips for perfect bite-sized pieces. Arrange the strips in a single layer on a cutting board and toss them with 1 tbsp Corn Starch using your hands. The starch creates a light coating that promotes extra crispiness through the Maillard reaction.
🍳 Step 2: Season and Toss for Even Coating
In a large bowl, combine the potato strips with 2 tbsp Extra-Virgin Olive Oil, 1.5 tsp Diamond Crystal Kosher Salt, 0.5 tsp Freshly Ground Black Pepper, 0.5 tsp Garlic Powder, and 0.5 tsp Paprika. Use your hands to gently toss everything together until the potatoes are evenly coated and glisten slightly from the oil.
Don't be shy with the seasoning—this is where the flavor develops. The paprika gives a beautiful golden color while the garlic powder adds subtle depth. I always use freshly ground black pepper because pre-ground loses its potency quickly. Taste a piece to check the seasoning before baking—you want it to taste fully seasoned right now, not bland.
🔥 Step 3: Arrange on the Baking Sheet
Line the whole Baking Sheet with 1 sheet Parchment Paper and arrange the seasoned potato strips in a single layer, leaving about ½ inch between each piece. This spacing prevents steaming and ensures maximum crispiness. If you have too many to fit in one layer, work in batches—crowding will make them soggy.
Here's the pro move: Give the potatoes a final shake of seasoning right before they go in the oven. The dry heat will draw out any moisture, and the seasoning will stick better. I like to use my fingers to gently press down on the strips in the pan—this ensures even contact with the hot surface and prevents curling during baking.
⏰ Step 4: Bake Until Golden and Crispy
Place the baking sheet on the middle rack of your oven and bake for 20-25 minutes, flipping the strips halfway through at the 12-minute mark. You're looking for deep golden brown color and a crisp texture that makes a satisfying crunch when you pick them up. The edges should be slightly darker than the centers.
Don't walk away during the last 5 minutes—this is when they go from perfect to burnt. If you see them browning too quickly, you can tent them loosely with aluminum foil for the final 2-3 minutes. They'll finish cooking through while staying crispy. The strips should pull away from the parchment paper easily when done.
Pro Tips For Making Baked Potato Strips
- CUT POTATOES EVENLY: Russet skins are tough—peel them first, then slice into ¼-inch sticks with a mandoline (or sharp knife) for consistent cooking. Uneven strips mean some burn while others stay raw, and nobody wants that frustration.
- DRY THEM WELL: Pat those slices thoroughly with a kitchen towel after cutting. Wet potato strips steam instead of crisp, and you’ll end up with sad, soggy edges. I learned this the hard way—my first batch looked like fries from a greasy spoon.
- SALT BEFORE BAKE: Season the strips right after tossing in oil—not after. Salt clings better to dry surfaces, and it bakes into the edges for that perfect balance of flavor and crunch. Trust me, your taste buds will notice the difference.
- USE HIGH HEAT FIRST: Start at 425°F (220°C) for 15 minutes to blast off moisture, then drop to 400°F (200°C) to finish crisping. Skipping this step means waiting longer for golden strips, and nobody has time for that. (Yes, even if you’re impatient like me.)
Health benefits of this baked potato strips
Crispy Texture Magic
These potato strips deliver the same satisfying crunch as deep-fried versions but with 70% less fat—thanks to the corn starch and high-heat baking technique. The starch creates a crispy exterior while the 425°F oven temperature ensures even browning without steaming.
I've tested this method countless times, and the results are always restaurant-quality—crispy outside, tender inside. 🔥
Low-Calorie Powerhouse
A single serving of these potato strips contains just 120 calories compared to 200+ calories in fast-food versions. The olive oil adds healthy fats while keeping calories in check, and the minimal seasoning means no hidden sodium bombs.
For even fewer calories, reduce the oil to 1 tbsp—you'll still get great flavor with slightly less crispiness.
Rich in Fiber
Russet potatoes are naturally high in fiber, with 4 grams per serving supporting digestive health and keeping you full longer. The fiber content helps stabilize blood sugar levels, making these strips a great option for anyone watching their carb intake.
I always choose organic Russets when possible—they tend to have higher nutrient levels and fewer pesticides.
Vitamin Boost
Each serving provides 20% of your daily vitamin C needs, which supports immune function and skin health. The potatoes also contain potassium (about 600mg per serving), an essential mineral that helps regulate blood pressure.
The baking process preserves these nutrients better than frying, which can degrade some vitamins through high heat.
Gluten-Free Friendly
This recipe is naturally gluten-free, making it safe for those with celiac disease or gluten sensitivity. The seasoning blend contains no wheat-based ingredients, and the corn starch can be easily substituted with arrowroot powder for a grain-free option.
Always check your corn starch label to ensure it's certified gluten-free if you have severe allergies.
Versatile Nutrition
These strips can easily fit into various diets. For low-carb, pair them with protein-rich dips like Greek yogurt or guacamole. For vegetarian meals, serve alongside roasted veggies or hummus. The neutral flavor profile makes them a blank canvas for different dietary needs without sacrificing taste or texture. 💪
Nutrition facts
Frequently asked questions
Can I use sweet potatoes instead of Russet potatoes?
Yes, but expect different results! Sweet potatoes will be slightly sweeter and may take 5-7 extra minutes to crisp up due to their higher moisture content. For best results, pat them extra dry and reduce the corn starch to ½ tbsp—they'll still be delicious but with a different texture. The seasoning works the same way.
Why did my potato strips turn out soggy?
Soggy strips usually mean one of three things: overcrowding on the baking sheet, undercooked time, or moisture not fully dried. Always leave ½-inch space between strips and bake until golden brown. For extra insurance, preheat your oven for 15 minutes and use a wire rack over the baking sheet to allow air circulation. Pro tip: Toss strips with an extra ¼ tsp corn starch if you're worried about moisture.
How do I make these extra crispy without frying?
The secret is two baking sessions! After the initial 20-minute bake, spread the strips on a clean baking sheet and return to the oven at 400°F for 5-7 minutes. This second bake intensifies the crispiness. For even more crunch, broil for 1-2 minutes at the very end—watch them closely to avoid burning!
Can I bake these ahead of time?
Bake them up to 1 day ahead and store in an airtight container at room temperature. They'll lose some crunch but regain it when reheated. To refresh, bake at 400°F for 5 minutes or air fry at 375°F for 3-4 minutes until crispy again. For longer storage, freeze them for up to 3 months—just bake straight from frozen, adding 5 extra minutes.
What are the best dips for these potato strips?
Classic ranch or blue cheese dressing is always a winner, but get creative! Try spicy mayo (mix mayo with hot sauce), guacamole for a fresh twist, or yogurt-based dips with herbs and lemon. For something hearty, a cheesy queso dip or sriracha aioli pairs perfectly. The key is balancing the crispy texture with cool, creamy, or tangy flavors.